When most people travel, they buy one thing: souvenirs. I’ve bought plenty of keychains and magnets from those kitschy souvenir shops that seem to exist everywhere. As great as the [insert name of city] magnet or bottle opener is, I’ve found that I want something more memorable to remind me of the places I’ve visited.
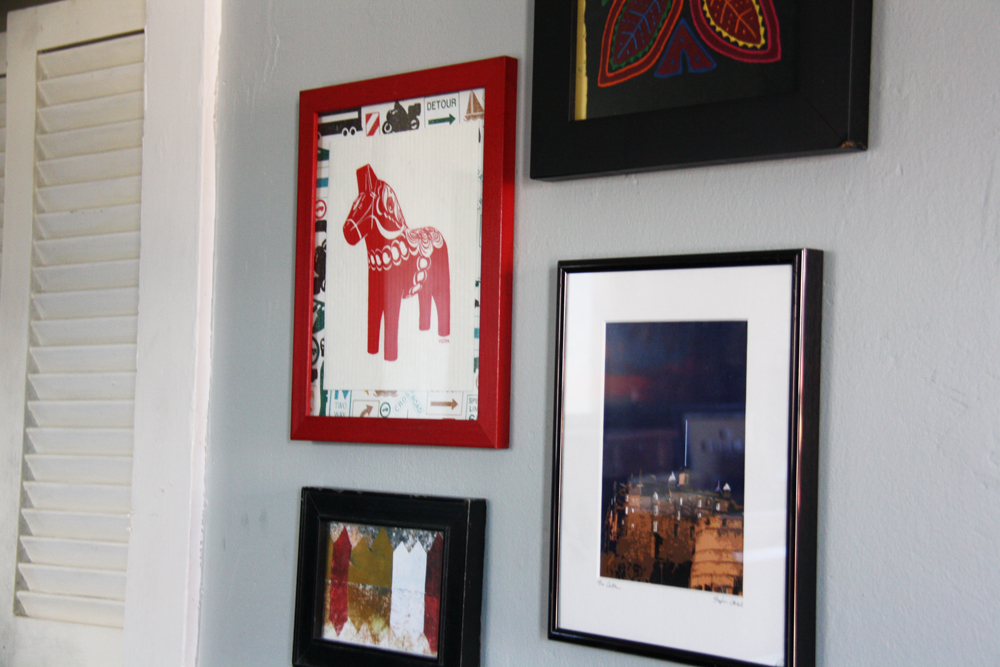
Over the past few years, I’ve collected different types of artwork from the countries I’ve visited. To show them off, I put together a wall of travel art in my apartment. Displaying memorabilia collected from the different trips I’ve taken works not only as a souvenir, but also as personalized home décor. It also makes a great way to remember my travels.
The great thing about creating a wall of travel art is all the possibilities! The collection can be made up of prints, photographs, postcards, one-of-a-kind paintings, fabric, scraps of paper… (you get the idea).
When I travel, I try to keep the expenses low. Most of my trips to foreign countries have involved staying at hostels or budget hotels, and packing lunch from the free hostel breakfast. As such, I try not to spend too much money on souvenirs. Here are some ideas for finding awesome art for cheap:
1. Buy postcards
You can usually get a few of these for under a dollar. Avoid the ones that look like they’ve been printing the same picture since 1982. The right postcards can actually make stylish artwork. Something as simple as a postcard with the country’s flag and name in a snazzy frame can add a “vintage poster feel” to a travel wall. I also like to find postcards of my favorite sites and landmarks that look more like fancy prints rather than postcards. Also look out for local artists. Local artists often create postcard versions of their art, and generally they are MUCH cheaper. I’ve found this to be a great way to get a unique, local print for less than the cost of a cup of coffee.
2. Explore different mediums
Artwork for a wall doesn’t have to be prints or paintings. One of the features on my art wall is a piece of fabric from a little market in Costa Rica. The design was made by a local and it was hand-sewn. I used double-sided tape to attach the fabric to the back of the frame. It made it appear to be “floating” and allowed me to add some extra color (yellow) as the backdrop. Not only was the fabric unique and locally-made, it also didn’t cost a lot, due to its size (somewhere around $15-$20).
3. Find art in everything
You can transform almost any item into a piece of art. You just need to get a little creative. For example, on my travel wall I have a picture of a red horse that I got in Sweden. (The red horse is called a dalecarlian or dala horse and is an icon of the country). The “picture” is actually some kind of pot holder/hot pad that I bought in a home store for only a few dollars. I knew I wanted something with the Swedish horse on it and I’d been searching through traditional souvenir stores looking for something, but everything I found was overpriced and kind of cheesy. Then I spotted that pot holder. I knew I could transform it into a cool piece of art with a fun picture frame and mat. I chose a red frame that I bought at a garage sale for $1 and used a piece of scrapbook paper for the background. The whole work of art cost me $5 – $10.
4. Shop for street art
One of my best friends and travel companion likes to buy items from local street artists. This is a great budget strategy. Buying street art typically costs a fraction of the price of purchasing art from a gallery. It also gives you the opportunity to talk directly to the artist. Be sure to ask questions, find out who actually makes the art, etc. During a trip to Edinburgh, Scotland, I was lucky enough to come across a street art market. I picked up a picture with bright coloring and a modern flare of the Edinburgh castle. I got to chat with the artist, who told me that he liked to take the traditional tourist sites and create a different take on them. Not only did I get a great souvenir to remember the place I visited, but I also got a fun memory.
Collecting art from your adventures can make your trip extra fun. It gives you something to look for as you stop at local markets and stores. Remember, the travel art wall is your own creation. Just make sure you have room for what you buy in your bag! Happy travels!
This is a guest post for Red Leaf Style by Kara Hudson. A Monday through Friday accountant, Kara is an avid weekend traveler and garage saler.
Related articles:
Travel Planning Board
Weekend in St. Louis
Missouri Travel Series: The Start


June 21, 2015
[…] articles: Make a Travel Art Wall From Souvenirs Cork Trivet Wall Décor Decorating with Botanical Prints (Plus Free […]
August 18, 2015
[…] Related articles: Embroidery Hoop Art Cork Trivet Wall Décor Make a Travel Art Wall From Souvenirs […]
August 25, 2015
[…] Related articles: Ikea Hack: Curtain Wire to Photo Display Traveling Planning Board Make a Travel Art Wall from Souvenirs […]