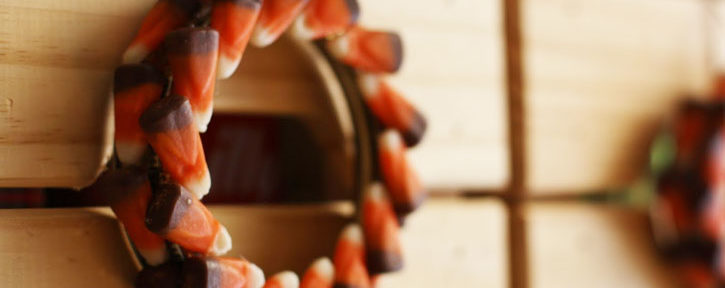
Inside: Hit the sweet spot when it comes to fall decorating with these easy-to-make candy corn wreaths. (Yes, they’re made with real candy corn!) Don’t devour that whole bag of candy corn yet. Save some to make these cute candy corn wreaths. This simple home décor project transforms the iconic Halloween treat into fall décor for your home. Add a touch of festivity (and fun!) to your Halloween or fall displays with these super simple wreaths. And, because they’re not too Halloween-themed, you can even keep them up through Thanksgiving. Dress up your house with these festive mini candy corn wreaths. Here’s how to make them. You’ll need just a few supplies to get started. The main supplies are just candy corn and mason jar lids. (You’ll also need your trusty hot glue gun.) What you’ll need: – Candy corn – Mason jar lids (I used Wide Mouth lids.) – Hot glue gun – Twine Making a mini candy corn wreath is pretty straightforward. Simply, start hot gluing your candy corn kernels around the top of the rim. (I used Wide Mouth mason jar rims.) Arrange the kernels so that they all face in the same direction. Doing so will...
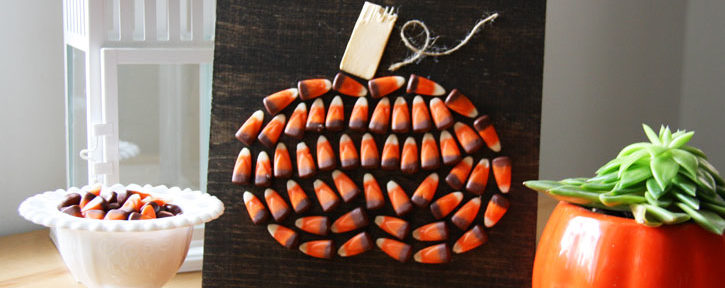
How to Make Cute Candy Corn Art in 30 Minutes
Forget everything you know about candy corn. This easy-to-make candy corn art project shows off this iconic candy in a whole new way. (Just don't eat the whole bag before you're finished.)...
Favorite Kansas City Things: August 2016
It’s hard to put your finger on it exactly, but I think it’s safe to say that Kansas City, Mo., is experiencing a Renaissance of sorts. This cow town that straddles a border with Kansas City, Kan., has really come into itself over the past few years—and the nation is taking notice. Maybe it was the Kansas City Royals winning the 2015 World Series. Or, perhaps it’s the excitement for the KC Streetcar, which just opened in May and runs from the River Market to Union Station. Maybe it’s the ever-popular First Friday in the Crossroads Arts District every month or the blossoming vintage and antiques scene in the West Bottoms. Whatever it is, Kansas City is happening. Whether you’re visiting Kansas City or you’ve been here all your life, it’s time to start exploring this city. I’ve lived here five years and I feel like I’m just now starting to discover everything Kansas City has to offer. That’s why I’m starting this new blog series; to share the hidden gems, the local favorites and the places you have to check out in Kansas City. Here’s what I’ve been exploring this month. First Friday: Art Starts at the KC...
How to Repurpose an Old Dresser Drawer into a Wine Rack
We’ve all seen repurposed dresser drawer projects. Turning an old drawer into a shelf. A dog bed. A planter. While I love all of these projects (anything old to new again is awesome in my book,) I wanted to try something a bit different. I racked (get it!) my brain for a repurposed dresser drawer project I hadn’t seen before. When I saw the wine bottles on my bar cart, inspiration hit. Turn an old dresser drawer into a wine rack. My dad gave me an old dresser drawer that, when flipped on its side, was the exact height to fit a few wine bottles. From there it took some trial and error to get the wine rack just right. I came up with this project when tasked with producing a repurposed dresser drawer project for the Summer 2016 issue of VintageKC magazine. I wanted to create a piece of décor that fit my style—and that I’d actually use. Sometimes it feels like so many of the DIY or craft projects you see in magazines or on Pinterest look neat but aren’t something you’d enjoy having around for years. I think my wine rack fits the bill. You’ll need...
Published in VintageKC Magazine: Summer 2016
Everybody loves a good repurpose project and I took on a repurpose challenge in the latest issue of VintageKC magazine. Every issue, a handful of creative bloggers and artists are tasked with creating a craft around a theme. The theme for this issue was to transform an old dresser drawer. I wanted to turn my dresser drawer into more than just something pretty. I wanted it to be something I would actually use. When I saw the wine bottles on my bar cart, inspiration hit. A wine rack is both functional and decorative. Win-win! If you want more details on how to make your own wine rack from an old dresser drawer, check out my tutorial. There are a bunch of other creative dresser drawer projects featured in the magazine, so be sure to check those out. You can see them all in the digital edition of the magazine. Related articles: Published in VintageKC Magazine: Spring 2016 Published in VintageKC Magazine: Winter 2015 Published in VintageKC Magazine: Fall 2015...
All Boxed Up
My life is in boxes. Inside a big box. All of my stuff has been wrapped up, boxed up, taped up and crammed into a storage unit. It’s better than the alternative, though. I moved out of my rental house because of a mold issue that made me sick. Even though my life is in boxes, I’m doing okay. And, don’t worry, I’m not actually living in a box. My twin sister has let me make her home my home for the time being. But as a homebody who loves home decorating, home cooking and just hanging out at home, the boxed up lifestyle wasn’t easy at first. Feeling boxed in It’s no secret that I love home decorating. I’m not really sure what to do with myself when I’m not jumping from one DIY project to the next. I need to be painting something, gluing something or cutting something. My fingers are itching to rearrange furniture, revamp bookshelves and hang up art. I want to make messes. Try out crafts. And make pretty things. It’s a little bit harder since I don’t have a home of my own. Although, I’m sure my sister would say she has plenty of home...
How to Make Your Own Adventure (Sign)
Don’t you love when projects you decide to make and complete in 10 minutes turn out better than you could have ever expected? That’s what happened when I made this “adventure” sign. It’s just a piece of particleboard I found in a dresser drawer (for another DIY project that’s in the works,) some leftover Miss Mustard Seed milk paint in ironstone (from that same previous project,) and chalkboard paint. Making this simple sign couldn’t have been easier. I brushed on a swipe of milk paint and let it dry. I wanted that distressed look, so it didn’t matter that I didn’t have enough paint left to completely cover the board. Convenient! Then, I freehand drew “adventure” on the board using a pencil and then went over it with a small paintbrush and chalkboard paint. If you’re not comfortable freehanding the lettering, search “adventure sign” on Pinterest for some typography ideas. This simple DIY sign project cost next-to nothing and truly did turn trash into treasure. I was about to throw this piece of board into the fire pit when inspiration hit and I knew I could transform it into a fun sign. Lately, I’ve noticed I’m starting to gravitate...


