
For some reason I don’t (well, didn’t) own a Christmas wreath. Too many moves in too few years, and too tight a hold on my wallet, are likely the causes. This year though, it was time for a wreath. My door looked all sad and lonely and “bah hum bug-y” without one.
As you’ll see if you stick around here at Red Leaf Style, I’m kind of a crazy person about making my own décor. Or, at least finding it for cheap at secondhand shops and thrift stores. So, of course I wasn’t just going to buy a wreath. Gosh. I was going to make one. Preferably in the least expensive way possible.
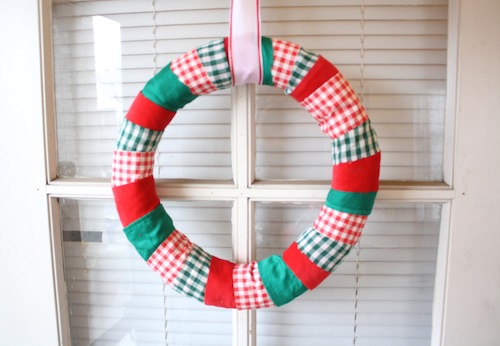
After a little thinking (Pinterest searching), I decided to make my own fabric wreath. (Copy this wreath.) It seemed relatively easy and didn’t require a lot of supplies. I assembled everything I needed through trips to secondhand stores.
Budget Breakdown:
Straw wreath form: $1, D.A.V.
Green and red checkered fabric & red corduroy: $7, Re-Runs Vintage Apparel, Kansas City (I dug these pieces of fabric out of a huge box.)
Green fabric (Was originally an Old Navy shirt.): $2.09, Goodwill
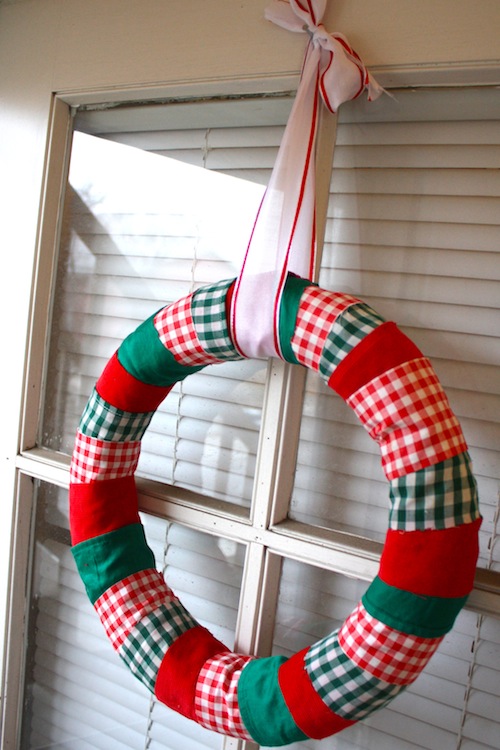
Ribbon: $0.50, Goodwill
Total: About $11
Could I just buy a new wreath for $11? Yes, yes I could. But, what’s the fun in that? And, technically the wreath actually cost less than $11 because I have tons of fabric and ribbon left over to use for other projects. And, it’s one of a kind. Pretty much, it’s just way better, okay?
I’m sorry I don’t have a tutorial for you. When I decided to make the wreath, I figured it out as I went, and it’s far from perfect. In fact, you probably shouldn’t do it my way. So, I’ll tell you how you should do it.
The tutorial for the wreath where I got the inspiration from called for a styrofoam wreath that you cut in half so that the wreath sits flush against the door. This tutorial also suggested gluing the pieces of fabric to the flat side of the cut-in-half wreath so that they pull straight and you won’t see any messy edges. Well, I found a straw wreath at the D.A.V., not a styrofoam wreath. Clearly that thing wouldn’t do well if I tried to trim it in half, so I just determined what side would be the “back” and secured all of the strips of fabric with hot glue to that side.
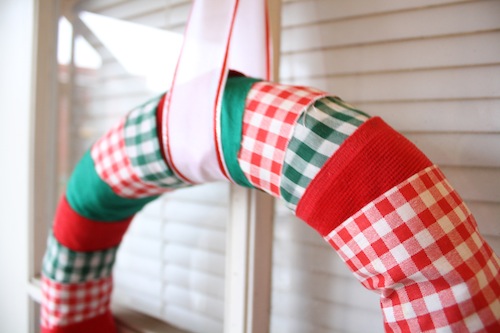
I was also supposed to use craft scissors to cut the fabric into strips. That way the strips of fabric were in pretty, straight lines, not wavy monstrosities, like the ones I cut with my kitchen shears. This frustrated me for a while, until I had an “ah hah” moment. If I followed the lines already on the checkered fabric and corduroy as I cut, and went really really slowly, it made straight lines! Yay!
With the green fabric, which was actually a shirt, straightness was not happening. So, I used the hems of the shirt as a guide for those strips of fabric. That way when I hot glued a strip to the wreath, the straight hem showed. And, I could cover up the other side (the non-straight one that I cut) with another piece of fabric. Whew. Now that I’ve revealed all of the imperfections of my wreath, I hope you still like it anyway. I sure do.
Keep Up With Red Leaf Style!
Follow Red Leaf Style author Kirsten Hudson on Twitter @kirsten_hudson, Google+ and Pinterest.
December 22, 2012
[…] ← Do-It-Yourself Fabric Wreath […]
December 22, 2012
[…] ← Do-It-Yourself Fabric Wreath […]
December 11, 2017
[…] a festive wreath on your door! I currently have three wreaths around my house. Pictured above is my DIY Fabric Wreath from two years ago. It’s made from a foam wreath and scraps of fabric. (I added that festive […]